
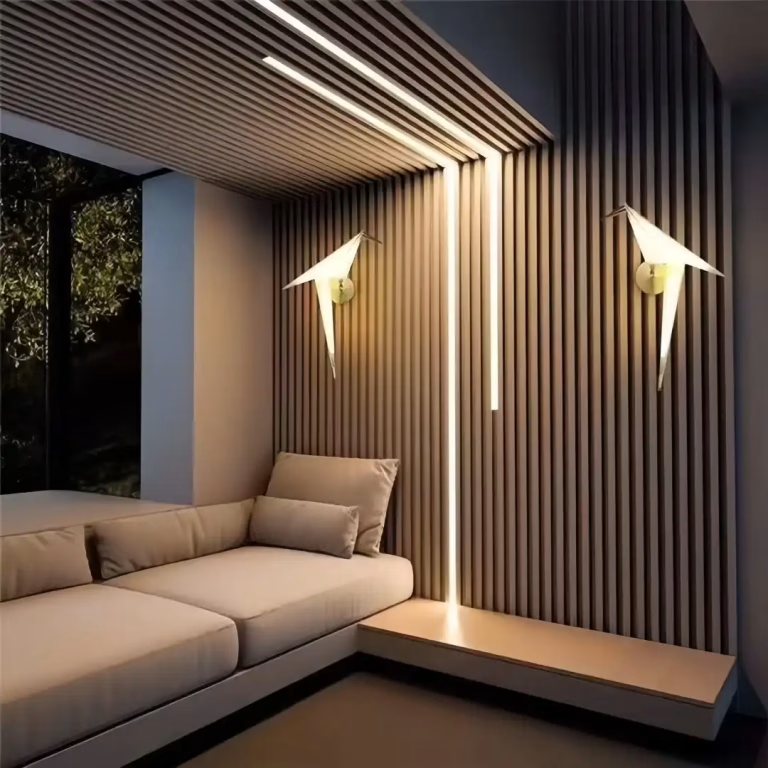



Why Choose Wood Slat Panels for Your Ceiling?
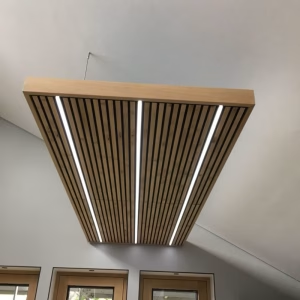
What Are Wood Slat Panels?
Traditionally, wood slat panels are precision-milled wooden planks designed with interlocking rabbet joints along their edges, creating consistent, uniform gaps between each board when installed. Modern iterations, including acoustic wall panels and acoustic ceiling panels from Seninpanel, combine this classic design with sound-dampening materials, making them dual-purpose decorative acoustic panels that elevate aesthetics while improving room acoustics.
The Dual Benefits: Aesthetic Versatility & Acoustic Performance
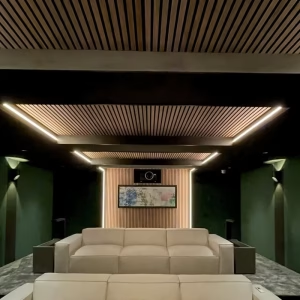
Wood slat ceiling panels offer unmatched value for both residential and commercial projects, with two core advantages:
- Timeless, customizable design: Available in a wide range of wood species, finishes, widths, and layouts, wood slat panels complement every design style, from farmhouse chic to modern minimalist, industrial, and Scandinavian. Vertical installations can make low ceilings feel taller, while wide planks create a bold, eye-catching focal point.
- Proven acoustic benefits: Purpose-built wood acoustic panels are highly effective sound absorbing panels, reducing echo, reverberation, and ambient noise in living rooms, home theaters, and open-concept spaces. For commercial projects, office acoustic panels with a wood slat design strike the perfect balance between professional style and functional noise reduction panels, creating more comfortable, productive work environments.
How to Choose the Right Wood Slat & Acoustic Panels for Your Project
With endless options on the market, selecting the right panels for your space is critical to a successful project. Here’s what to consider:
Popular Material & Style Options
Your options for wood slat panels are nearly endless, allowing you to tailor your ceiling to your space’s unique needs and aesthetic:
- Solid natural wood planks: Offer timeless warmth and unique grain character, ideal for high-end residential and commercial projects.
- Reclaimed wood panels: An eco-friendly, budget-conscious choice with one-of-a-kind rustic charm; Seninpanel offers a range of reclaimed wood wall panels and ceiling options for sustainable renovations.
- Engineered wood & laminate planks: Durable, moisture-resistant, and available in a wide range of finishes, perfect for high-humidity spaces like bathrooms or basements.
- Peel-and-stick wood slat panels: A game-changer for DIYers, Seninpanel’s peel-and-stick real wood planks eliminate the need for complex tools, making installation effortless without sacrificing quality.
- Painted wood slat panels: Fully customizable to any color palette, with bright white being a classic choice that maximizes light reflection and makes spaces feel larger.
Key Considerations for Panel Selection
- Width: Standard plank widths range from 5 to 8 inches (measured excluding the rabbet joint). Wide planks create a bold statement, while narrower planks offer a more refined, seamless look. Choose a width that complements your space’s scale and overall design.
- Acoustic needs: If noise reduction is a priority, opt for purpose-built acoustic ceiling panels with sound-absorbing backing, designed to act as effective soundproof wall panels and ceiling solutions.
- Installation method: For DIY projects, peel-and-stick or tongue-and-groove panels simplify the process, while traditional planks work well for professional installations.
- Environmental factors: For moisture-prone spaces, select planks with moisture-resistant finishes and paints that can withstand humidity and cover minor imperfections.
- Orientation: While horizontal installation is traditional, vertical or diagonal layouts can make rooms feel larger and add unique visual interest.
Pre-Installation Preparation: Tools, Materials & Safety
Proper preparation is the foundation of a professional, long-lasting installation. Skipping these steps can lead to mistakes, warping, or uneven panels down the line.
Essential Tools & Materials Checklist
Before starting your project, gather all necessary tools and materials to ensure a smooth installation:
- Wood slat panels or acoustic ceiling panels (purchase 10% extra to account for cuts, mistakes, and waste)
- Ladder or scaffolding (rated for your ceiling height, with stable footing)
- Stud finder
- Tape measure, pencil, and chalk line
- Electric miter saw or jigsaw (for accurate, clean cuts)
- 18-gauge brad nailer with 2-inch brad nails, or 1-1/4 inch crown staples
- Construction adhesive (for extra hold, especially for peel-and-stick panels)
- Wood filler, fine-grit sandpaper, and finishing supplies (paint, stain, sealant)
- Safety gear: work gloves, safety glasses, and hearing protection
- Hole saw (for cutting around recessed light fixtures)
Critical Safety Protocols
Safety is non-negotiable for any overhead ceiling installation project:
- Always wear safety glasses and work gloves to protect against flying debris and sharp edges.
- Use a stable, properly rated ladder, and maintain three points of contact at all times when climbing.
- For high ceilings or large projects, use scaffolding instead of a ladder for added stability.
- If working with others, assign a spotter to assist with the ladder and pass materials.
- Turn off power to the room at the circuit breaker before working around recessed lights or electrical fixtures.
Ceiling Prep & Layout Planning
- Locate and mark ceiling joists: Use a stud finder to locate ceiling joists (typically spaced 16 inches apart in residential construction). Mark each joist’s full length with a chalk line or pencil, as these will be the anchor points for your panels.
- Measure your ceiling accurately: Calculate the total square footage of your ceiling by multiplying the length by the width (e.g., a 12ft x 12ft room = 144 sq ft of coverage). This ensures you purchase the correct amount of material.
- Plan your layout: Decide on your panel orientation (horizontal, vertical, diagonal) and stagger end joints between rows for an authentic, seamless look. Avoid narrow, awkward cuts at the edges of the room by adjusting your starting layout.
- Acclimate your panels: Leave your wood slat panels in the installation room for 48-72 hours before installing. This allows the wood to acclimate to the room’s temperature and humidity, preventing warping or gaps after installation.
- Mark obstacles: Pre-mark the location of recessed lights, ceiling fans, beams, and other fixtures on your ceiling and corresponding panels to ensure precise cuts.
Step-by-Step Wood Slat Panel Ceiling Installation Guide
With your prep work complete, it’s time to install your panels. Follow these steps for a flawless, professional finish:
Step 1: Finalize Your Starting Line
Begin by snapping a straight, level chalk line across your ceiling to mark the position of your first panel. This ensures your entire installation stays straight and aligned, even if your walls or ceiling are not perfectly square. For the most seamless look, start installation along the longest, straightest wall in the room.
Step 2: Cut Panels to Size
Using your miter saw, cut your panels to the required length based on your layout. For staggered joints, vary the length of the first panel in each row to ensure end joints do not line up between adjacent rows. For obstacles like recessed lights, use a hole saw or jigsaw to cut precise openings in the panel before installation, double-checking measurements to avoid gaps.
Step 3: Install Your Panels
- For your first panel, apply a continuous bead of construction adhesive to the back of the plank, align it perfectly with your starting chalk line, and press it firmly against the ceiling.
- Secure the panel to the ceiling joists using your brad nailer, driving nails through the tongue of the rabbet joint at a 45-degree angle to hide nail holes. Space nails evenly along each joist for maximum hold.
- Fit the next panel into the previous one’s rabbet joint, ensuring a snug, seamless fit. Repeat the adhesive and nailing process, working your way across the ceiling from one side to the other.
- For peel-and-stick panels from Seninpanel, simply remove the backing, align the panel with your layout, and press firmly into place, adding brad nails at the joists for extra security if desired.
Step 4: Navigate Obstacles Like Recessed Lights & Beams
Obstacles are common in ceiling installations, but with careful planning, they’re easy to navigate:
- Recessed light fixtures: Mark the exact position of the fixture on your panel, measure the diameter of the fixture housing, and use a hole saw to cut a perfectly sized opening. Test fit the panel before securing it to ensure no unsightly gaps around the fixture.
- Ceiling beams and soffits: Use a jigsaw to cut custom notches in your panels to fit around beams or soffits, taking precise measurements to ensure a tight, professional fit.
- Electrical boxes: Always turn off power before working around electrical fixtures, and ensure panels do not cover junction boxes or electrical components.
Step 5: Finishing Touches for a Professional Look
Once all panels are securely fastened to the ceiling, it’s time to add the finishing touches:
- Fill all visible nail holes with wood filler that matches your panel’s finish, and let it dry completely.
- Sand the filled areas smooth with fine-grit sandpaper, wiping away any dust with a clean cloth.
- For natural wood finishes: Apply a clear sealant or stain if desired, to protect the wood and enhance its natural grain.
- For painted finishes: Apply two coats of high-quality paint, using a brush for gaps and a roller for flat surfaces. Let each coat dry completely before applying the next.
- Reinstall all light fixtures, ceiling fans, and other hardware, and clean the ceiling surface to remove any remaining dust or debris.
DIY vs. Professional Installation: Cost & Value Breakdown
One of the biggest questions for any renovation project is whether to DIY or hire a professional. Here’s a clear breakdown to help you decide:
DIY Installation Cost
DIY installation is the most budget-friendly option, with material costs ranging from $1 to $7 per square foot for standard wood slat panels, and $3 to $12 per square foot for premium acoustic ceiling panels. Tool costs are minimal if you already own basic power tools; specialty tools like a brad nailer can be rented for a small fee. The main investment is your time, with a standard 12ft x 12ft room taking 1-2 days to complete for a DIYer with basic experience.
Professional Installation Cost
Hiring a professional installer typically costs $11 or more per square foot, including materials and labor, with prices varying based on your location, project complexity, and material selection. Higher costs are often due to:
- Professional expertise and precision, ensuring a flawless finish with no wasted material
- Additional prep work for uneven ceilings, popcorn ceilings, or complex layouts
- Custom cuts for recessed lights, beams, and other obstacles
- Liability insurance and warranty coverage for the work
Which Option Is Right for You?
DIY installation is ideal for homeowners with basic renovation experience, small to medium-sized projects, and a tight budget. Professional installation is better for large commercial projects, complex layouts, high-end wood acoustic panels, or anyone who wants to guarantee a perfect finish without the time investment. Either way, wood slat panel ceilings add significant value to your home or commercial space, with a timeless look that outlasts trendy design fads.
Frequently Asked Questions (FAQs)
Q: Is it hard to install wood slat panels on a ceiling?
A: Installing wood slat panels on a ceiling is completely achievable for DIYers with basic home renovation experience. It requires careful planning, accurate measurements, and patience, but the process is straightforward with the right tools and a step-by-step guide. Peel-and-stick panels make the project even more accessible for first-time DIYers.
Q: Do wood slat acoustic panels reduce noise in a room?
A: Yes. Purpose-built wood acoustic panels are highly effective sound absorbing panels, reducing echo, reverberation, and ambient noise in residential and commercial spaces. For maximum noise reduction, opt for acoustic ceiling panels with a sound-dampening backing, which act as premium noise reduction panels for home theaters, offices, and open-concept living spaces.
Q: Can I install wood slat panels on a ceiling without drywall?
A: Absolutely. You can attach wood slat panels or acoustic ceiling panels directly to ceiling joists or furring strips, eliminating the need for drywall entirely. Just be sure to accurately locate and mark all joists with a stud finder to ensure secure, long-lasting installation.
Q: Can I install wood slat panels over an existing popcorn ceiling?
A: Yes, you can install wood slat panels over a popcorn ceiling, as long as the popcorn texture is securely bonded to the ceiling. For best results, locate and mark the ceiling joists through the popcorn texture, and attach the panels directly to the joists with brad nails and construction adhesive. If the popcorn texture is loose or damaged, scrape it off before installation for a more secure hold.
Q: What kind of nails should I use to install wood slat ceiling panels?
A: For most ceiling installations, we recommend using 2-inch 18-gauge brad nails with a brad nailer, or 1-1/4 inch crown staples. These fasteners provide a secure hold, and when driven through the rabbet joint at a 45-degree angle, they leave no visible nail holes on the face of the panels.
Q: Should I stagger the joints of my wood slat ceiling panels?
A: Yes, staggering the end joints between rows of panels creates a more authentic, professional, and visually appealing finish. Staggering also adds structural integrity to your installation, avoiding long, continuous seams that can weaken over time. For the most natural look, vary the stagger by at least 16 inches between adjacent rows.
Final Thoughts
Installing wood slat panels on your ceiling is a transformative renovation project that can turn a blank, boring ceiling into a stunning focal point of any space. Whether you’re a DIY homeowner looking to elevate your living room, a designer sourcing decorative acoustic panels for a commercial project, or a business owner upgrading your office with office acoustic panels, this classic design offers unmatched versatility, aesthetic appeal, and functional benefits.
With the right preparation, tools, and high-quality panels, a professional finish is well within reach for any skill level. For an eco-friendly, hassle-free DIY solution, explore Seninpanel’s range of reclaimed wood panels and peel-and-stick real wood planks, designed to make ceiling installations effortless without compromising on quality or style.